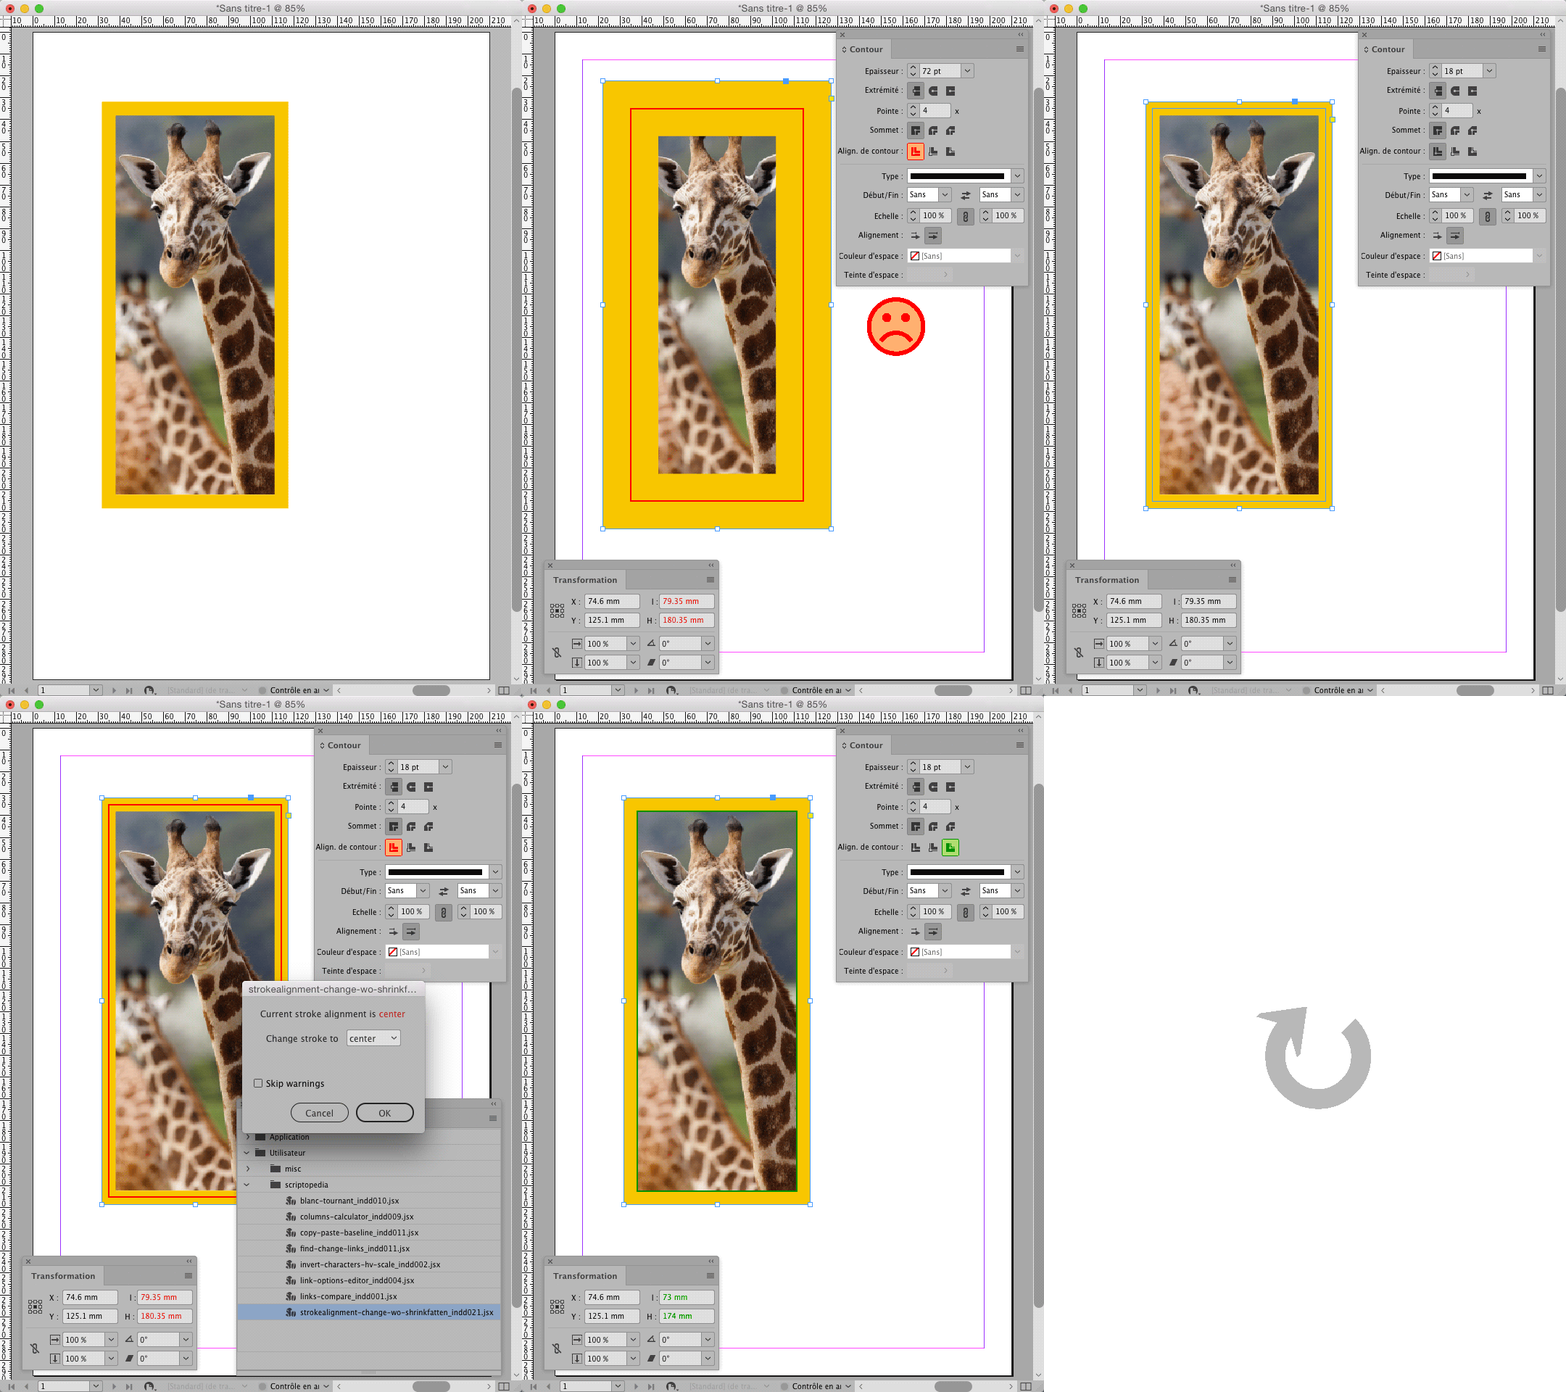
![]() This InDesign script enables to switch between the three available stroke alignments, while preserving the whole visible dimensions (including stroke) of a frame.
This InDesign script enables to switch between the three available stroke alignments, while preserving the whole visible dimensions (including stroke) of a frame.
 You have, in an InDesign document you were provided, a frame containing an image or some text, or simply empty, with a stroke of a given weight. You want to increase this weight only outside the frame without overlapping with the inner area occupied optionally by the image or the text. Or you want to increase this weight only inside the frame, at the expense of the optional content but without overgrowing outside. Yet the creator of the document had the bad idea to let the default stroke alignment “center”. Thus you are forced to calculate how much you will first have to reduce or increase the frame dimensions in order to get a visually identical result with an outside or inside stroke, before you can increase the weight only in the desired direction. In the case of the many users used to display the dimensions in millimeters and the stroke weight in points, the calculation will require fastidious conversions between units.
So this script is designed to avoid to you this effort and enables to switch at will from one to another of the available stroke alignments, no matter which are the measurement units preferences of the document.
The script is initially designed for rectangular or elliptic items the result will be visually identical for (it uses an alternate destructive and less reliable method for free shapes and polygons including triangles). For rectangles, the aspect of the corner shapes will be nearly preserved for the “Bevel”, “Inset” and “Rounded” effects, but the difference will be visible for the “Fancy” and “Inverse rounded” effects.
This script is one of the first ideas that occurred to me when I started to write Adobe scripts in 2013, because in InDesign documents converted from QuarkXPress ones, the frames with an inside stroke in the original document systematically ended with a centered stroke and dimensions (without stroke weight) accordingly reduced in InDesign. The idea is to change the stroke alignment of an item, then simply change its geometrical bounds (dimensions without stroke) in order to offset the stroke weight to restore the previous visible bounds (dimensions including the stroke). This simple and easily reversible method gives acceptable results for the most simple InDesign native item basic shapes: rectangles with or without corner effects, and ovals.
For this reason the script was initially not intended to handle polygons (including triangles), free shapes, edited paths, or paths pasted from Illustrator but it turns out possible, as long as they are closed paths, using a tip from Olav Kvern mentioned here ▶ Using InDesign as a CAD Tool - InDesignSecrets.com — taking advantage of the wrap path generated when activating the text wrap option in order to emulate Illustrator’s “Offset Path” command (In 2018 when I wrote the previous script version this article was already online but the link to Olav’s script was broken, since then it has been retrieved so I could recently study it and adapt his idea in my new version 22). Although it is a destructive process: if you start for example with a path with outer stroke, switch to inner and again to outer using this method you will not end with a path identical to the initial one (in that case if you want to revert to the initial path you better undo steps), inter alia because the initially sharp angles of the path often become rounded. Anyway it remains impossible to support any kind of open path such as lines.


Leave your comment